Posts

Showing posts with the label christmas

Elf Christmas Tree

Image
 I have already started on my Christmas cards, and for this one, I followed a tutorial by Gina K to create my background.  The very interesting technique is to use a stencil as an embosser - in a similar way to how you would use a die, with the rubber mat.  Then Gina suggests you score at 1/2" intervals, creating a wood effect - and finish off with your choice of spongeing.  So that's what I did with my first attempt - as you can see below. It was such fun to make, if a little fiddly - of course I didn't stop with one, as they can be addictive!  But I'm very happy with this clean and simple card.

2019 Christmas cards

Image
It's already near the end of the year, and I'm back again (Dame Nellie Melba??) with a few cards I've been making.  I'm not yet showing the more personal cards as they haven't been sent but these are the 'fun' cards I've enjoyed making. Using the stamps from Christmas Gleaming by Stampin' Up - paper from my stash. Some gnomes and dies A raccoon die I had fun putting together:} The hole in the wall is popular this year, and I used last year's Santa already stamped and coloured to place in that wall.

July Scrapbook Boutique Blog Hop and Challenge

Image
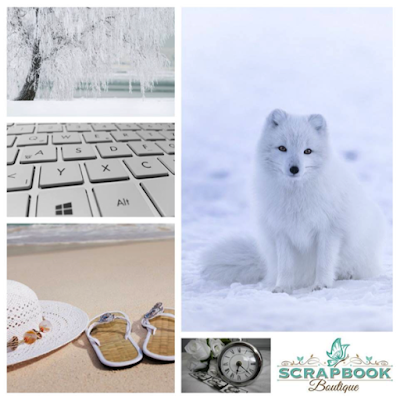
Welcome once again to  Scrapbook Boutique's  monthly challenge and blog hop.  You should have arrived here from  Angela's  amazing blog but if you didn't and want to start at the beginning, just click on the SBB blog link above and start again!   Here is July's Moodboard Inspiration picture We'd love you to join in with us this month!  There are two ways you can do this - you can comment on each blog in the hop, ending with the SBB blog, or you can create a project (either a card, scrapbook layout or off the page project) inspired by this moodboard.  Of course you can do both for a chance to win both prizes!  Please check out the rules of entry, and the prizes at the  Scrapbook Boutique Blog  and note that this challenge is open to Australian  and New Zealand residents. From the moodboard, I was inspired by the wintry tree in the top left and the keyboard letters, and chose to make an early Christmas ...

Less is More - one layer #358

Image
The latest challenge at   Less is More is the one layer challenge, with the theme of candles or something depicting light.  Perfect for one more Christmas card I thought, so found some time to make this CAS card.  The silver heat embossed sentiment is difficult to see, so I have included this extra photo for detail. I used Zig watercolour markers for the colouring, not using very much water as it was heat embossed on regular card.  I'm afraid the spongeing around the image is a little heavier than I wanted, but doesn't seem too bad when looking at the card in its entirety.  I should have remembered that Less is More!

Less is More Colour Challenge

Image
Wow!  It's been ages since I've entered into the Less is More challenge, even though I visit often!  This week I seem to have found some time and I'm entering this simple CAS card for the colour challenge - red and green!  How appropriate as we are all trying hard to complete enough cards to send out, without having to resort to buying any. Stencil:  Simon Says Stamp - from an old kit from 2014 Sentiment:  Stampin' Up! Merriest Wishes stamp set Embellishment:  Ranger enamel dots

Stars

Image
This week at Less is More challenge number 350 is a one-layer card with the theme of Stars. I'm caught up with making Christmas cards at the moment, as I expect many of you are, so I thought of this challenge as an opportunity to make another card for my Christmas stash. My  lovely star came as a free gift with the magazine Cardmaking in Easy Steps Issue 17, which is at least a year old I think.  I white heat embossed the stamped star, heat set it, then used a star frame lit by Stampin' Up! to dry emboss around the shape.  Difficult to see I know, but in real life, it does add a little something.  The sentiment is an old Verve stamp and the little cluster of stars is from SU Year of Cheers stamp set. Ink for spongeing:  Distress Oxide:  Cracked Pistachio, Broken China and Wilted Violet.

Scrapbook Boutique November Blog Hop and Challenge

Image
Welcome once again to  Scrapbook Boutique's  monthly challenge and blog hop.  You should have arrived here from  Angela's  amazing blog but if you didn't and want to start at the beginning, just click on the SBB blog link above and start again!  Today's challenge will be the last for this year, and fittingly, the inspiration board is very, very Christmasy! Christmas is such a fun time of the year for most of us, especially the dressing of the tree, with brilliant baubles, tinsel and decorations in abundance.  So for my card I have chosen to make a bauble 'shaker' - this time the shaker is on top of the card, not concealed between the card and the card front, and if it was not adhered to the card, could actually be hung on the tree, as it is a separate element. I have used the Kaisercraft stamp and die set called 'Merry Christmas' - stamping the tree and deer, spongeing the background and adding glitter, before the sequins and beads were...

WCMD - and the card I made on that day

Image
Yesterday I was engrossed with all the cards I saw on fb and elsewhere marking this special day in the cardmakers' calendar, and one technique that really caught my eye was the Pop and Pivet card.  I saw several of these cards, some using Stampin' Up! products that looked great, and one video I watched used Kaisercraft products.   This video shows the method I used to make my pop and pivot card, shown by Collette Mitrega on youtube.  She is an excellent tutor, because here is my card:  I used paper by Kaisercraft for all the sections - from the 6.5" x 6.5" paper pad, Holly Jolly. As the front of the card is lifted, the folded inside pages begin to unfold. This is the inside fully extended.  I do have to wonder though, how do you display this card - I guess you have to keep it closed and then when it's opened - Surprise! It was fun to make, and if you are interested, do check out Colette's video tutorial!

WCMD - and Less is More

Image
World Card Making Day has had loads of publicity on the internet this weekend, and although it was technically yesterday, I'm finally getting organised enough to post a card or two for this special occasion.  The challenge at Less is More today is a colour one - turquoise and lilac!  A beautiful combination, shown off superbly by the design team members.  So the first is the one that I'll be entering in this challenge, but the second is a bonus!  I loved the colour combination so much that I decided to make two cards - both images are from the same set, which includes the gorgeous sentiment stamps. The stamp set was a freebie included in a recent publication:  Cardmaking in Easy Steps, Issue 17.  It is an Australian magazine, and I love that their photopolymer stamps are of a very good quality - I think you can see that with the crisp sentiments. card recipe:  white heat emboss the image, mask the circle and use the following Dis...

Casing Happy Little Stampers

Image
Just a quick post to show you a card I CASEd from Happy Little Stampers first video demonstration. I loved how Kylie created her tree, using various circle stamps from her set Mix Mash.  I just had to try the technique for myself, but of course, I didn't own that particular stamp set.  Instead, I searched around for some plain circle stamps, and decided on 3 that would fit nicely in the masked triangle.  I then chose 3 colours I like together and away I went.  I have to admit that my first effort wasn't as well-balanced as it should have been, but this is my second attempt.  I am so happy with this one! The addition of those little black spots really finishes this design.  The sentiment is from Mixed Christmas sentiments. Thanks so much Kylie for your fab video! Needless to say, I have ordered this stamp set, and it is on its way already!  Love shopping locally!

Homespun Christmas

Image
For the last challenge of the year at Less is More, we have the theme of Homespun.  So here is my card - clean and simple, with a little bit of homespun. Recipe for my card: Tag die and little hearts by Lawn Cuts, Christmas tree and Heart die by WPlus9 - Pretty Patches, sentiment by Happy Little Stampers, Tag ring topper by WP9 - Timeless Tags 2, gingham is cloth washi tape adhered to cardstock, pattern paper by Kaisercraft:  Holly and Twigs

Throw Back Thursday with WPlus9

Image
I have been a fan of WPlus9 for some time, and today I noticed that they have a current challenge called Throwback Thursday.  It just happens that I made a card for a friend who wasn't feeling well enough to make the more than 100 cards she sends out each Christmas so together with our mutual friend, I made some pretty quick cards to help her along the way.  This is one of those cards, using the quilt die featured on their blog Stamp Away with me .  As you can see, I used traditional Christmas colours, and some fancy frames to create my card.  This is the first time I used the quilt die for a holiday card, having bought it because it reminded me of my old love - sewing! Paper:  Stampin' Up!paper pad Trim the Tree Dies:  WPlus9 Quilt Cuts 2, Cheery Lyn - sentiment, Spellbinders, Fleur de Lis, and scalloped square

Merry and Bright at Scrapbook Boutique

Image
I have a Christmas card to share today over at Scrapbook Boutique, but as you're here, I'll give you a little peak! You'll see the whole thing at Scrapbook Boutique, so pop on over to take a look! Thanks for visiting and happy crafting! Supplies from Scrapbook Boutique: Waffle Flower Holiday Labels - Merry Hero Arts Mint Julep shadow ink HA shadow ink lime green Hero Arts shadow ink - pale tomato Ranger embossing powder clear Pro Arts glue glider tape gun DI Shabby Shutters Distress Ink Mowed Lawn Memento Luxe Dandelion InLinkz.com

Another Christmas card

Image
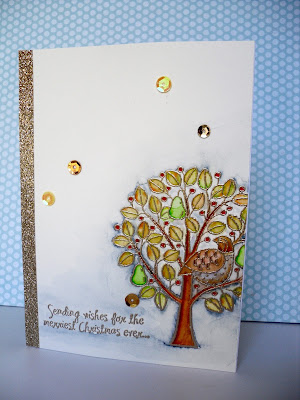
The challenge this week at Less is More is FRUIT.  Now like many of us, I'm still fixed in Christmas card production mode, so naturally my thoughts turned to 'and a Partridge in a pear tree'.  Luckily, I own the Stampin' Up! stamp set 'Partridge and Pears', so this is what I created: Card Recipe: Image and sentiment:  Partridge and Pears by SU Zig Clean Colour Real Brush Watercolour pens Heat embossed with Ranger Platinum embossing powder on watercolour paper Gold glitter strip and gold sequins