Scrapbook Boutique April Blog Hop and Challenge
Welcome to this month's challenge and blog hop at Scrapbook Boutique! Let's take a look at the beautiful mood board for this month:
Isn't it just too delicious?!!
Now to the housekeeping part - if you want to create something or just join in to win, there are two ways you can participate in this challenge and have a chance to win a prize. You can comment on each blog, ending with the SBB blog, or you can create a project (either a card, scrapbook layout or off the page project) inspired by this photo. Of course you can do both for a chance to win both prizes! Please check out the rules of entry, and the prizes at the Scrapbook Boutique Blog and note that this challenge is open to Australian and New Zealand residents.
You should have arrived here from Angela's blog.
This is what I was inspired to create:
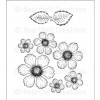
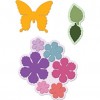
Firstly, it was all about the pink! and then the roses and then the sparkly bits of the chandelier. Because some of my craft stuff is still in storage (for another 6 weeks too - boo hoo!) I couldn't use my first choices, but I'm happy with what I did use: the Heartfelt Creations Botanical rose stamp and die.
I had been looking for an opportunity to try out a technique I saw Jennifer McGuire demonstrate, which was to use the die of a flower and cut it out of fun foam, and use it as a stamp! So this is how I created the coloured image below the stamped image. Of course, nothing is ever straightforward, or so it seems to me, because this stamp set very conveniently had all the stamps joined together, just as the die cut is joined, making it easy to die cut all of the layers at once. But I needed just 3 of the images, and the stamp is red rubber, so I couldn't see through it - so I tried to locate the stamp I needed, turn it over and try to stamp over the foam stamped image. It was definitely hit and miss, but I don't mind the result - it's free stamping, I say!
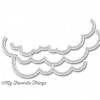
Over the stamped front panel, I secured a layer of vellum, to create the soft look of the mood board, and to finish the top and to give a break from all that pink, I adhered a white panel cut with MFTs cloud die, first stamping the sentiment in the same pink ink.
I also added a layered rose, made the traditional way, by stamping, colouring, cutting and shaping as demonstrated in the Heartfelt Creations videos.
From here you should hop over to Linda's blog!
Thanks for visiting and happy crafting!
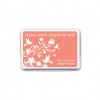
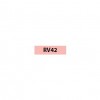
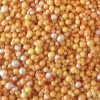
Products available from Scrapbook Boutique:






A beautiful card, I love the scalloped overlay.
ReplyDeleteLove that layered rose..amazing.
ReplyDeleteStunning card, love everything about it from your stamped and coloured flowers to the die cuts vellum and prills in the centre of your main flower. Wonderful
ReplyDeleteSo so pretty Ann, your flower is amazing!
ReplyDeleteLove the way you've used Jennifer's technique on the background Ann - great job and a very pretty card. I hope the next 6 weeks go by quickly for you without your crafting goodies - I know I would be getting the shakes if it was me lol.
ReplyDeleteThis is beautiful, so lovely and soft. I have die cut a butterfly from a die to create my own stamp image - I should use it! Love the technique and it stretches my supplies :)
ReplyDeleteI too hope the next 6 weeks go fast. I hope you are being distracted by other exciting jobs :)
Such a beautiful card
ReplyDeleteGorgeous, love the layered rose :)
ReplyDeletePink, flowers, sparkles - every girls dream! Love this card and considering you have most things in storage it's awesome that you can still create something so beautiful.
ReplyDeleteAbsolutely love.
Louise xo
just gorgeous Ann and when you finally get all your supplies back it will be like you've had a massive shopping spree!! xx
ReplyDeleteGreat technique! Great result! Also nice with the vellum to offset the colours. :)
ReplyDeleteSo much gorgeous detail in your card Ann - I especially love the gold prills!!
ReplyDeleteDeb.xx
Love those beautiful flowers ... vellum idea does really make for a romantic touch .. lovely card design x
ReplyDeleteBeautiful card, such pretty details, Cathy x
ReplyDeleteSuch a pretty card
ReplyDelete